
One of the first things you learn as a musician is how to hold your instrument properly. That comes before everything else because learning to play is difficult when you are not in the proper playing position. Trombones may seem trickier than other instruments at first, but can be easy to learn.
A Trombone is a brass instrument that produces its sound by the player’s lips vibrating (buzzing). Instead of valves, like all other brass horns, the trombone has a slide. The slide is moved in towards the musician or away to produce different notes. There are 7 slide positions and the most common type of trombone is a tenor trombone.
In this guide, you will learn how to properly hold your trombone through explanation, visuals, and youtube clips to ensure a deeper understanding.
This guide will also introduce you to the 7 slide positions that are essential for playing the trombone. These positions take a bit of practice but once you learn them, you are well on your way to becoming a terrific trombone player.
Additionally, this guide explains and answers common questions new trombone players often ask.
How to Hold a Trombone
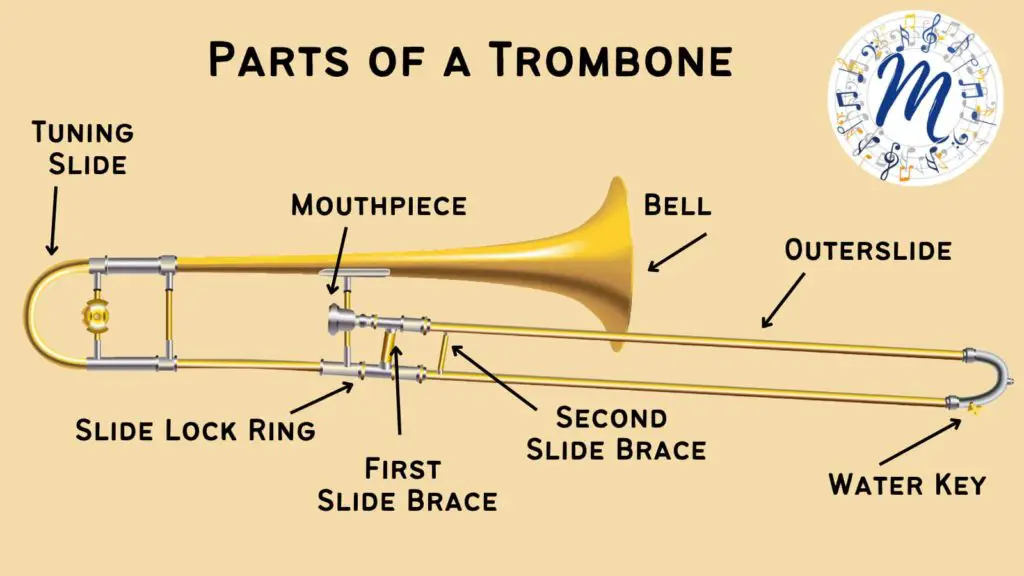
The first step to holding a trombone is first to identify the different parts of the instrument. The image below points to every aspect of the trombone you should know.
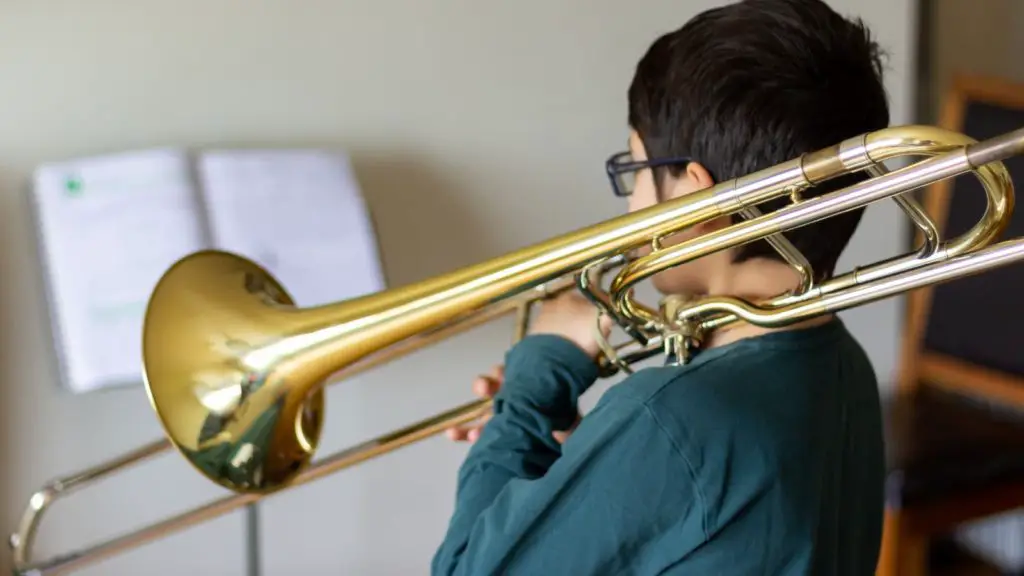
The trombone rests on/over your left shoulder and is held in position with your left hand, so we will start with the left hand.
Hold your left hand out with your middle finger, ring finger, and pinky wrapped into your hand. The pointer finger and thumb will make a “finger gun” shape. That is the general shape you will have your hand in.
The left thumb will wrap around the base of the instrument. The three fingers you have wrapped into your palm will wrap around the first slide brace. Your pointer finger will reach up to rest against the mouthpiece. If you aren’t able to reach the mouthpiece with your pointer finger, you can use your middle finger.
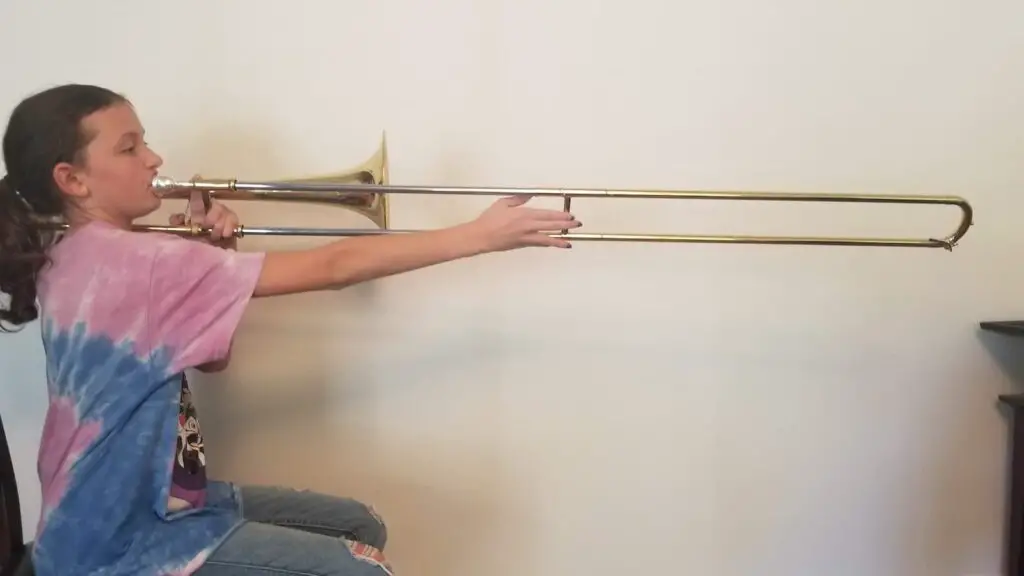
Now that the left hand is positioned correctly, it is time to move to the right hand. With your right hand, you will hold the second slide brace with your thumb on one side of the brace. The pointer and middle fingers will gently hold the other side of the brace in a pinching shape. Keep the fingers of your left hand together when you move the slide, or it can pinch your pinky when you play.
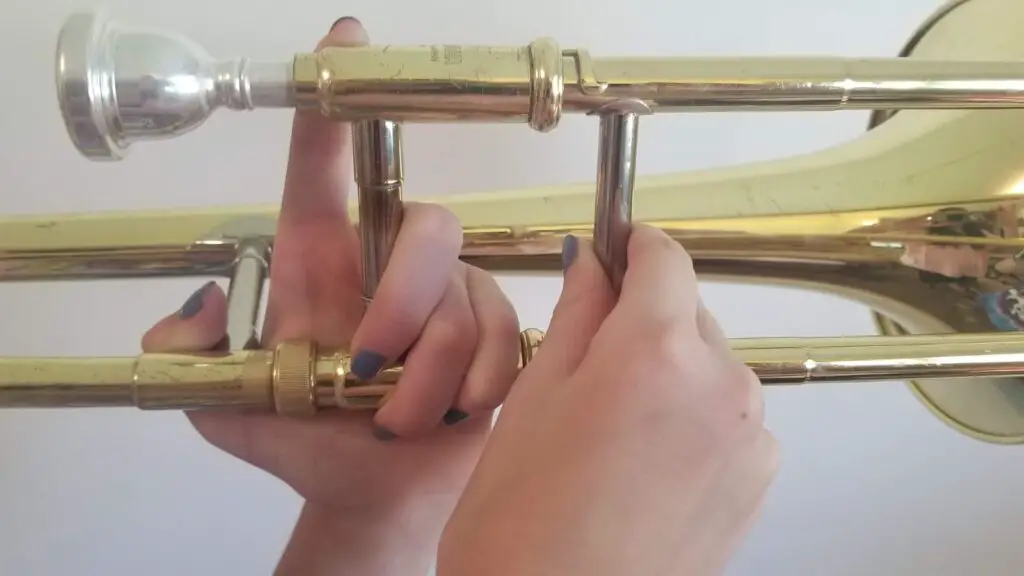
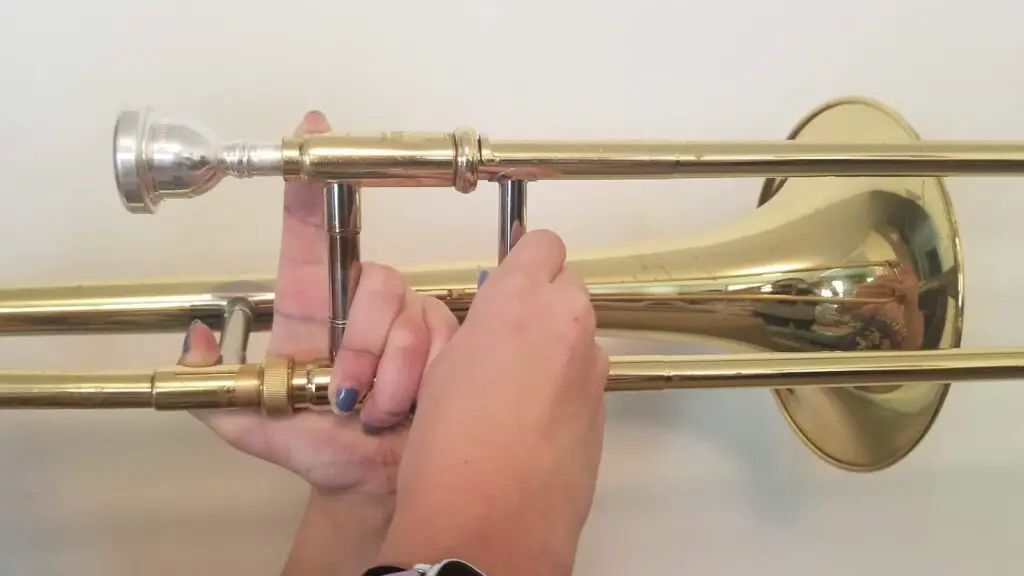
Look at the photo below and see if your hands look like that, or watch the video to learn how to hold your trombone.
Proper hand positions for the trombone.
The 7 Trombone Slide Positions
The trombone is a difficult (but not impossible) instrument to play because there are no valves or keys to change notes.
The notes change with the position of the slide. The closer your slide is to your mouthpiece, the higher the pitch will be. The farther away your slide is, the lower the pitch will be.
Top Tip: If you ever forget the name of a position, remind yourself about the pitches. It can help if you get lost in the music as well.
The trombone doesn’t have markers on the slide that let you know you are 100% in the proper position. It may take some time to find the note every time but that’s OK, learning an instrument takes time and practice.
There are 7 different slide positions for the trombone. Below is a basic slide position guide to visualize each position.
1st Position
First Position is the easiest to remember; the slide is pulled all the way in.
2nd Position
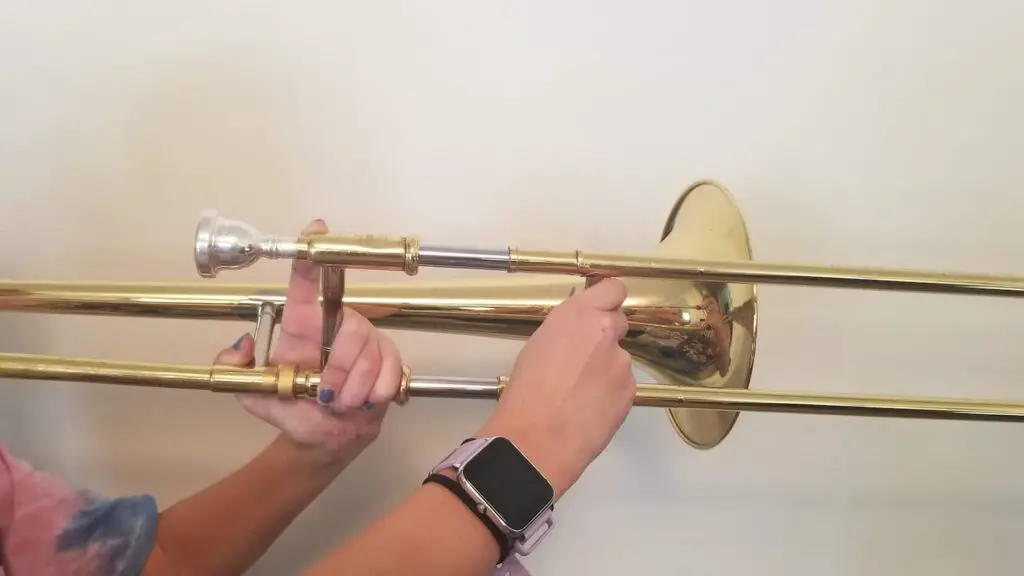
For Second Position, your right hand will push the slide around an inch to two and a half inches forward. A trick for finding 2nd Position is to look where the fingers of your right hand are. The fingers should be halfway between 1st Position and the bell of your horn. The photo below demonstrates how far to pull the slide for Second Position.
3rd Position
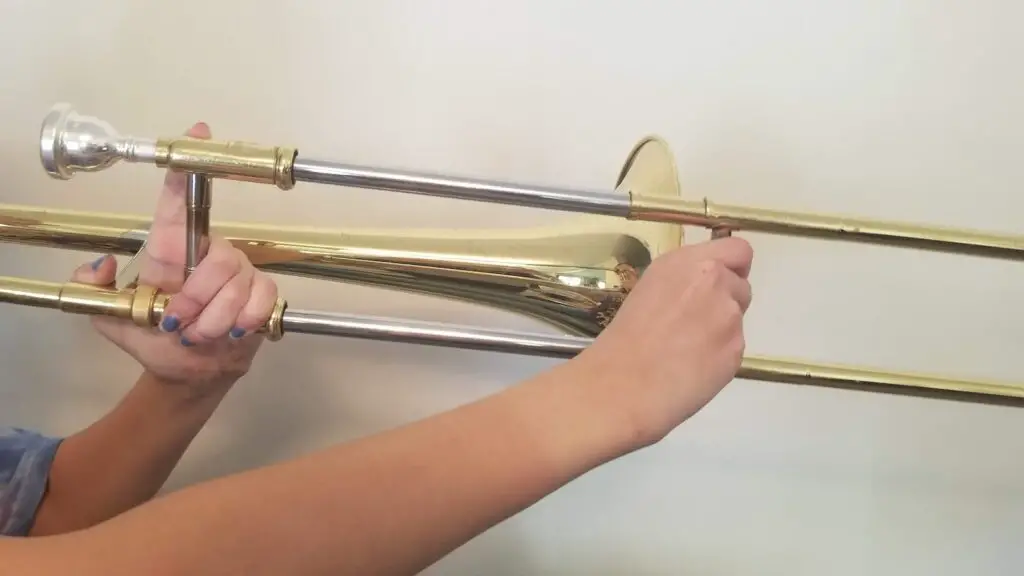
In the Third Position, the backs of your first and second fingers should almost touch the bell when you stick them out.
4th Position
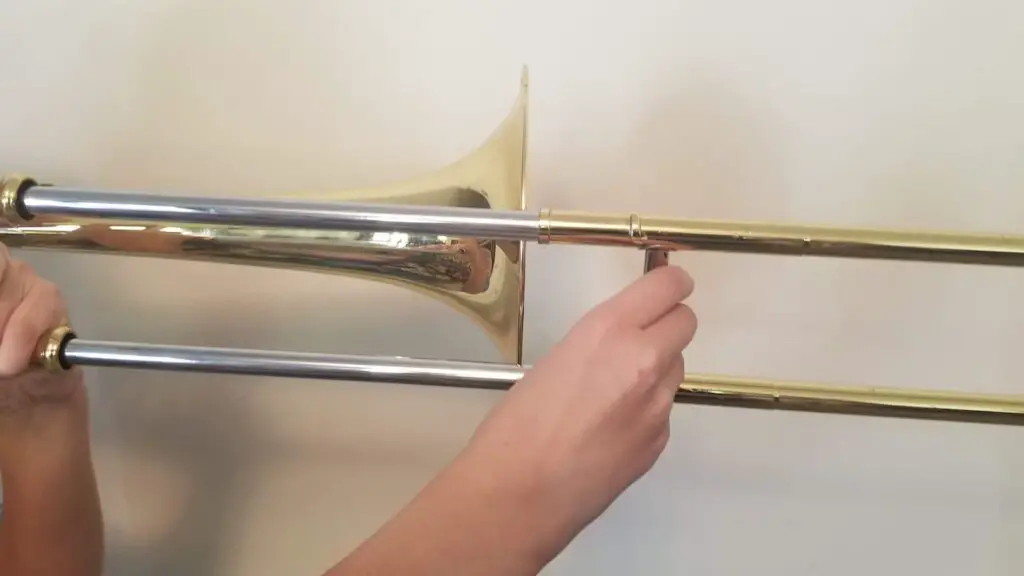
In Fourth Position, the end of your slide will be next to the bell or a few millimeters past the bell.
🎵 Note: The following three positions are the most difficult and will take time for your body to recognize where your arm needs to be.
5th Position
In Fifth Position, your wrist should be around 2.5 to 3 inches past the bell.

6th Position
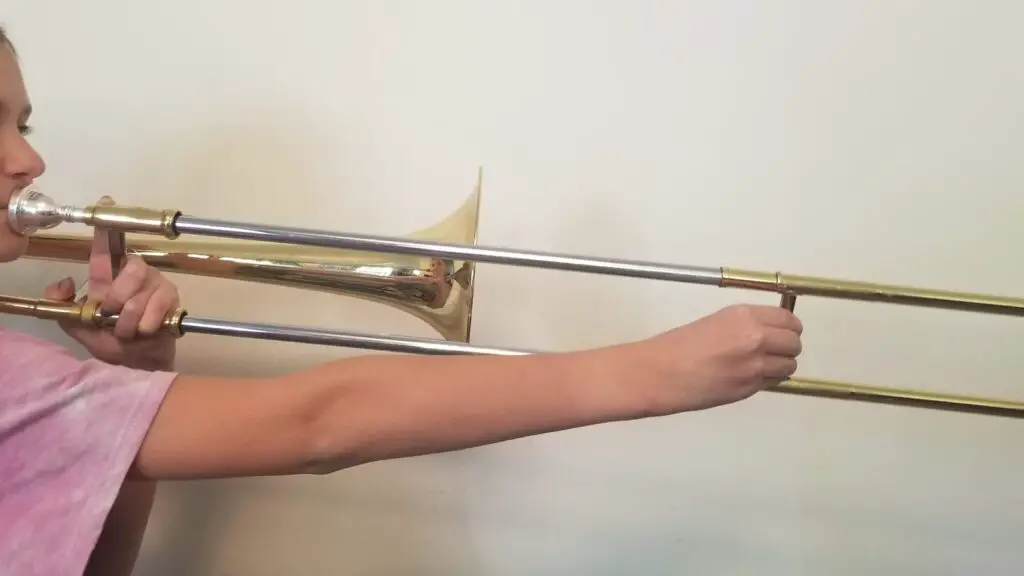
In Sixth Position your arms should almost be fully extended outward. Typically, trombone players will base their Sixth position according to how extended their arm is. Since this position varies by instrument and depends on how long your arms are, finding Sixth Position takes some experimenting.
7th Position
In Seventh Position, the slide will be fully extended almost to the point that the slide almost falls off. The seventh Position may be difficult or impossible to reach for younger students who are still growing. Seventh Position, like Sixth Position, takes some experimentation.
Knowing What Position your Trombone is in
Here is a great video explaining and demonstrating trombone slide positions.
Practice is the best way to know your slide position or experiment on finding how you can reach Sixth and Seventh Positions.
Top Tip: During this experimentation, use a digital tuner to watch when you hit the right notes in all positions. Practicing helps build muscle memory but it does take some time.
Learn more about how to create the best sound by reading:
Trombone Sound Troubleshooting Guide (Fuzzy, Airy, Muffled, Weird)
If you are in elementary or middle school don’t worry about not being able to reach the last two positions. You are still growing but it is important to still try to get into Sixth and Seventh Positions.
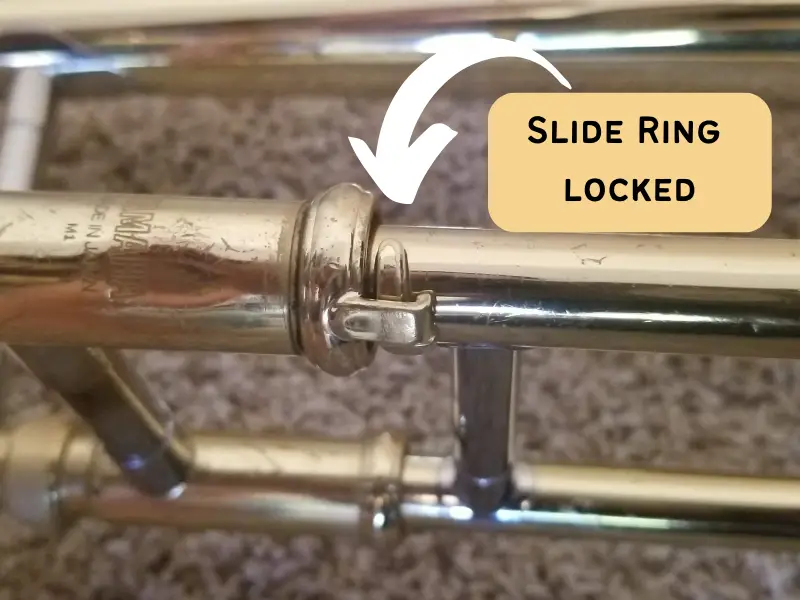
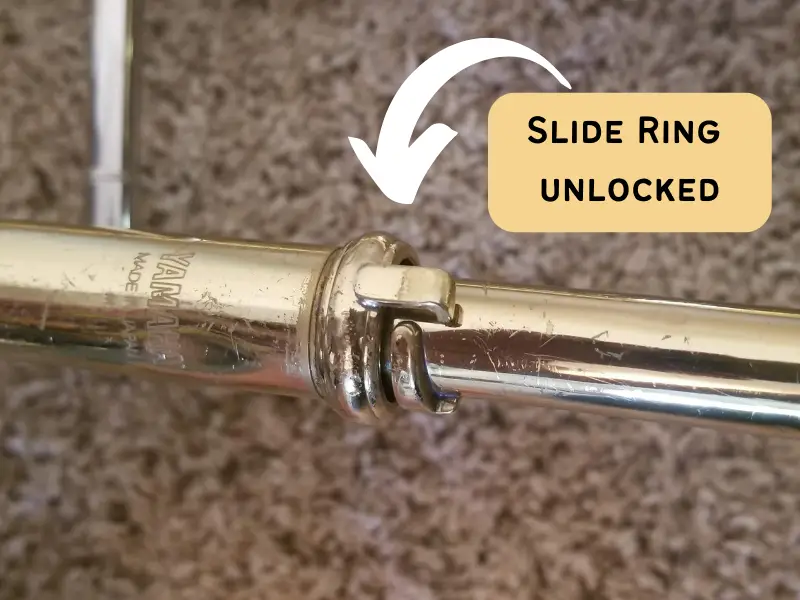
Slide Locks
When your slide is in First Position, there will be a ring with a small hook near the 2nd Slide Brace that is called a slide lock.
When the ring is twisted, it will lock your slide in place so it can’t fall off. Locking your slide is recommended when walking with your trombone (to your chair or out to a marching field).
Instruments can be damaged when dropped and brass instruments can be bent or crushed and locking the slide prevents any damage to the slide.
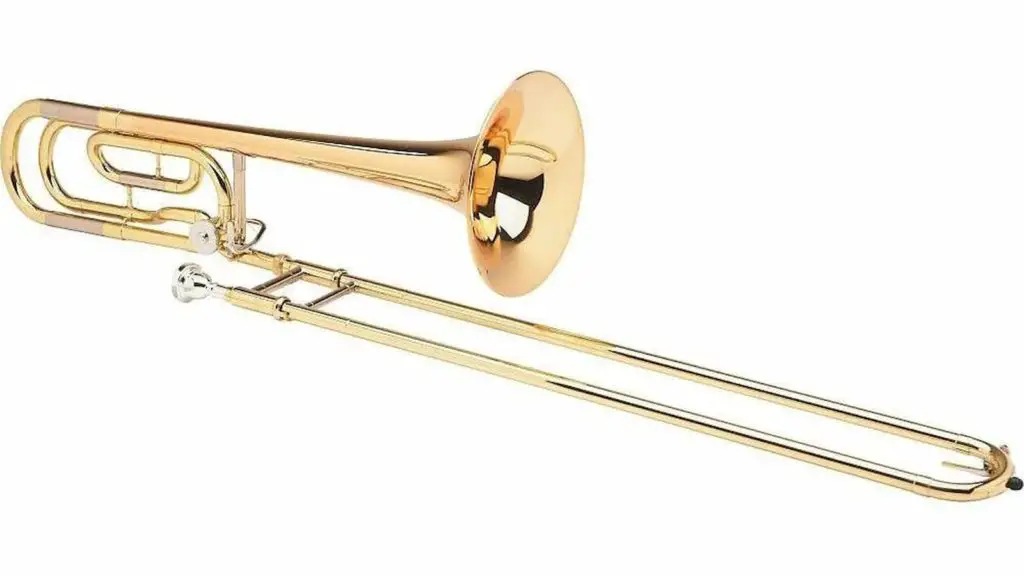
The F Attachment
The F Attachment also called a trigger or quart valve, is a metal mechanism that when pressed, will open extra tubing changing the key of the trombone from Bb to F.
The F Attachment on a tenor trombone (your standard trombone is a tenor trombone), will drop the pitch by a perfect fourth.
This means a player can reach a lower range than a standard tenor trombone can reach. This range allows the musician to play more advanced techniques such as false tones, trills, and pedal tones.
When you pull or activate the trigger, the notes will change pitch without having to move the slide in order to achieve these notes. A trigger can be mechanically activated or through what is known as a string linkage.
The most common F Attachment will be the mechanically activated form. When the trigger is pulled, it will open a valve to the extra tubing. It tends to make a noticeable click sound when it is activated.
Is there a difference if you are left-handed or right-handed?
When you hold a trombone, regardless of if it is a tenor or bass, the hand position will always be the same.
The instrument is held with the left hand while the right hand operates the slide. The brand name of the trombone does not impact or change the way the instrument is held. Additionally, there is no such thing as a “right-handed trombone.”
While people may be right or left-handed, most instruments can not be altered based on the dominant hand of the musician. It may feel strange relying on one hand, more than the other at first, but it becomes second nature the longer you play your instrument.
If you are a professional you might be able to work with a company to custom build a “right-handed trombone” but this is incredibly rare. Unless you have a physical disability and holding or operating your instrument in a typical way is not physically possible, it will always be held as mentioned earlier in this article.
Now that you have learned how to hold your trombone, the 7 slide positions, and some additional information about the trombone it is time to start learning to read music. Don’t forget, the only way to improve is to practice and then practice some more!
Top Tip: If you are interested in playing your trombone in the marching band be sure to check out this article! Marching Trombone vs Flugabone (Your Complete Guide)
Disclaimer: This post may contain affiliate links. We only recommend high-quality products that are used and recommended by real musicians. If you use these links to buy something we earn a small commission.